

RDMO - Quick Start Guide
This Guide is for anyone considering using RDMO to create a management data plan for their research project. RDMO will help you with project planning and data management task organisation over the entire data life-cycle. The question catalogues integrated into RDMO form the basic structure of the data management plan. The questionnaires reflect the requirements set by the research funding organisations.
What is RDMO?
The web-based Software Research Data Management Organiser (RDMO) is open source software. The University Library of the Ludwig-Maximilians-Universität München operates its own RDMO instance, which is available free of charge to members of the University.
General information on the Research Data Management Organiser (RDMO)
Log in
On the right-hand side of the RDMO interface is the login area, where you can either register a new RDMO account or log in with your existing details.
RDMO instance operated by the LMU University Library
You also have the additional option of logging in via the third party provider ORCID. To do this, click on this symbol: ![]()
Overview: the Welcome Page
After successfully logging in you will see your own personal Welcome Page, with an overview of all available functions:
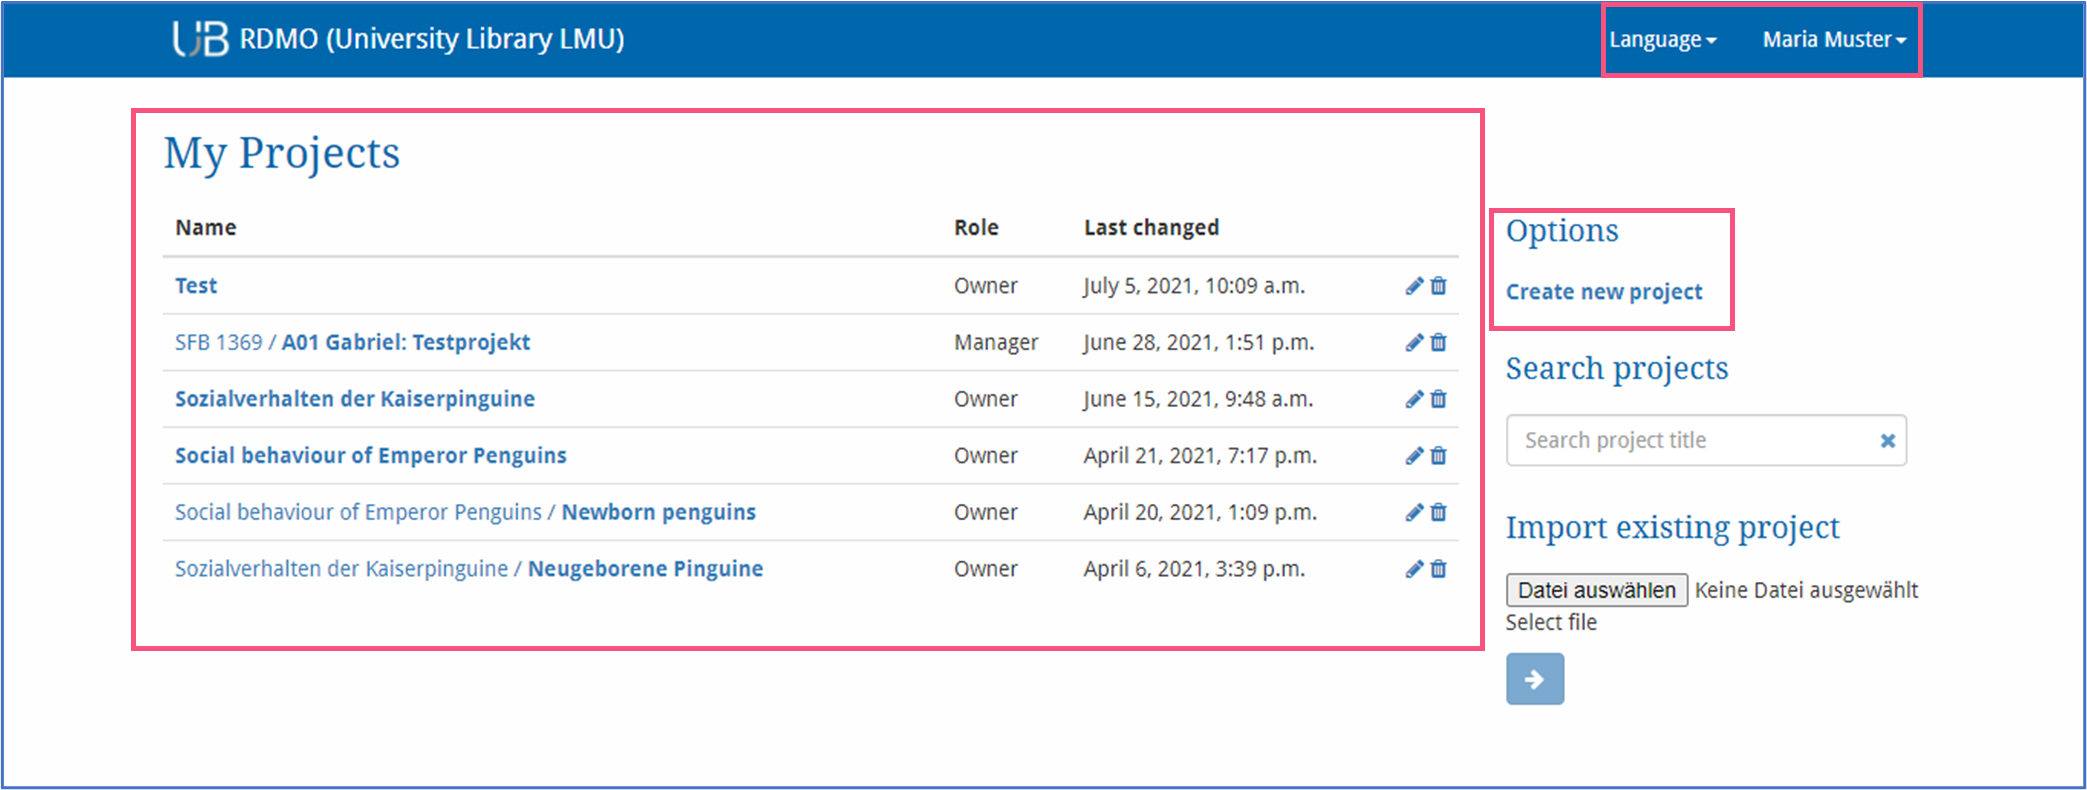
- In the "My Projects" area you will see all the data management plans you have created so far, or to which you have access. You can also see when each plan was last edited. To the right of these details are symbols enabling you to edit your plans.
- In the right-hand column you have the option of creating a new project, searching within your projects or importing an existing project.
- In the top right-hand corner, you can select your preferred language; the interface is currently available in German and English. Clicking on the small arrow next to your name will open a menu with which you can change your profile settings or log out.
How to create a new plan
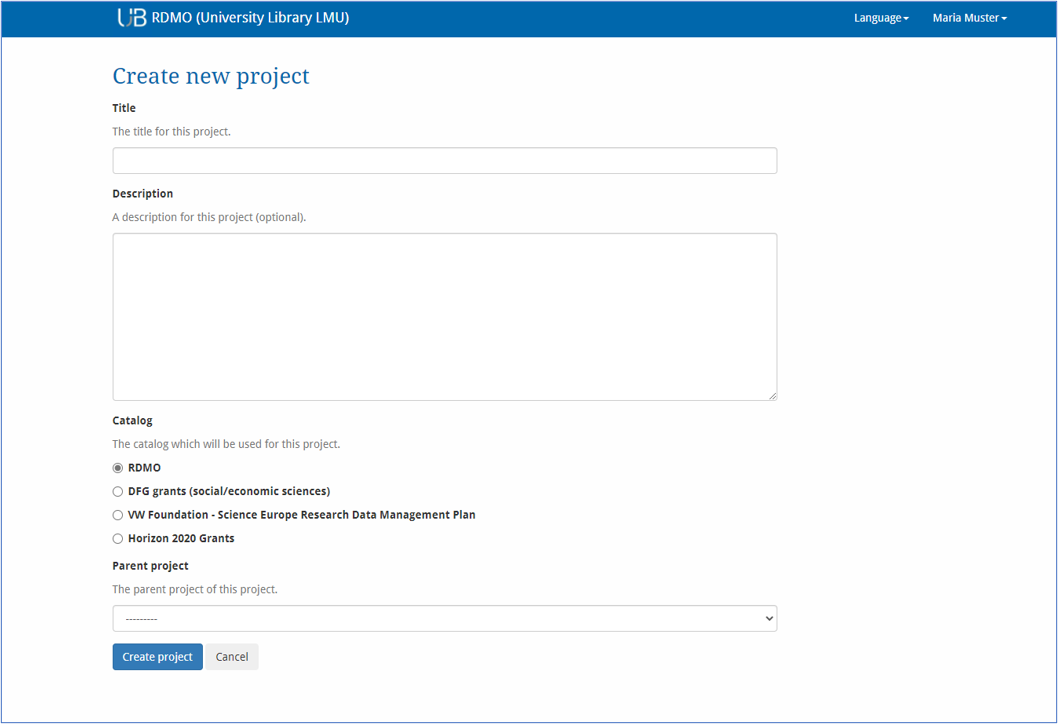
To create a new data management plan, select "Create new project" on the Welcome page. The following information is required:
- Title: Enter a descriptive name for your new data management plan.
- Description: If necessary, add additional information explaining the purpose of your data management plan.
- Catalog: Select a catalogue of questions that fits the project and which will form the basic structure of your data management plan. The questions indicate various aspects the data management plan should consider. You can change your selection later. A standard questionnaire is included in the RDMO template.
- Parent project: To enable you to map more complex hierarchical project structures you have the option of creating a separate data management plan for a sub-project and linking it with a parent project. When you create the connection, you can transfer various information elements automatically.
You have now finished creating your new project.
Answering questions
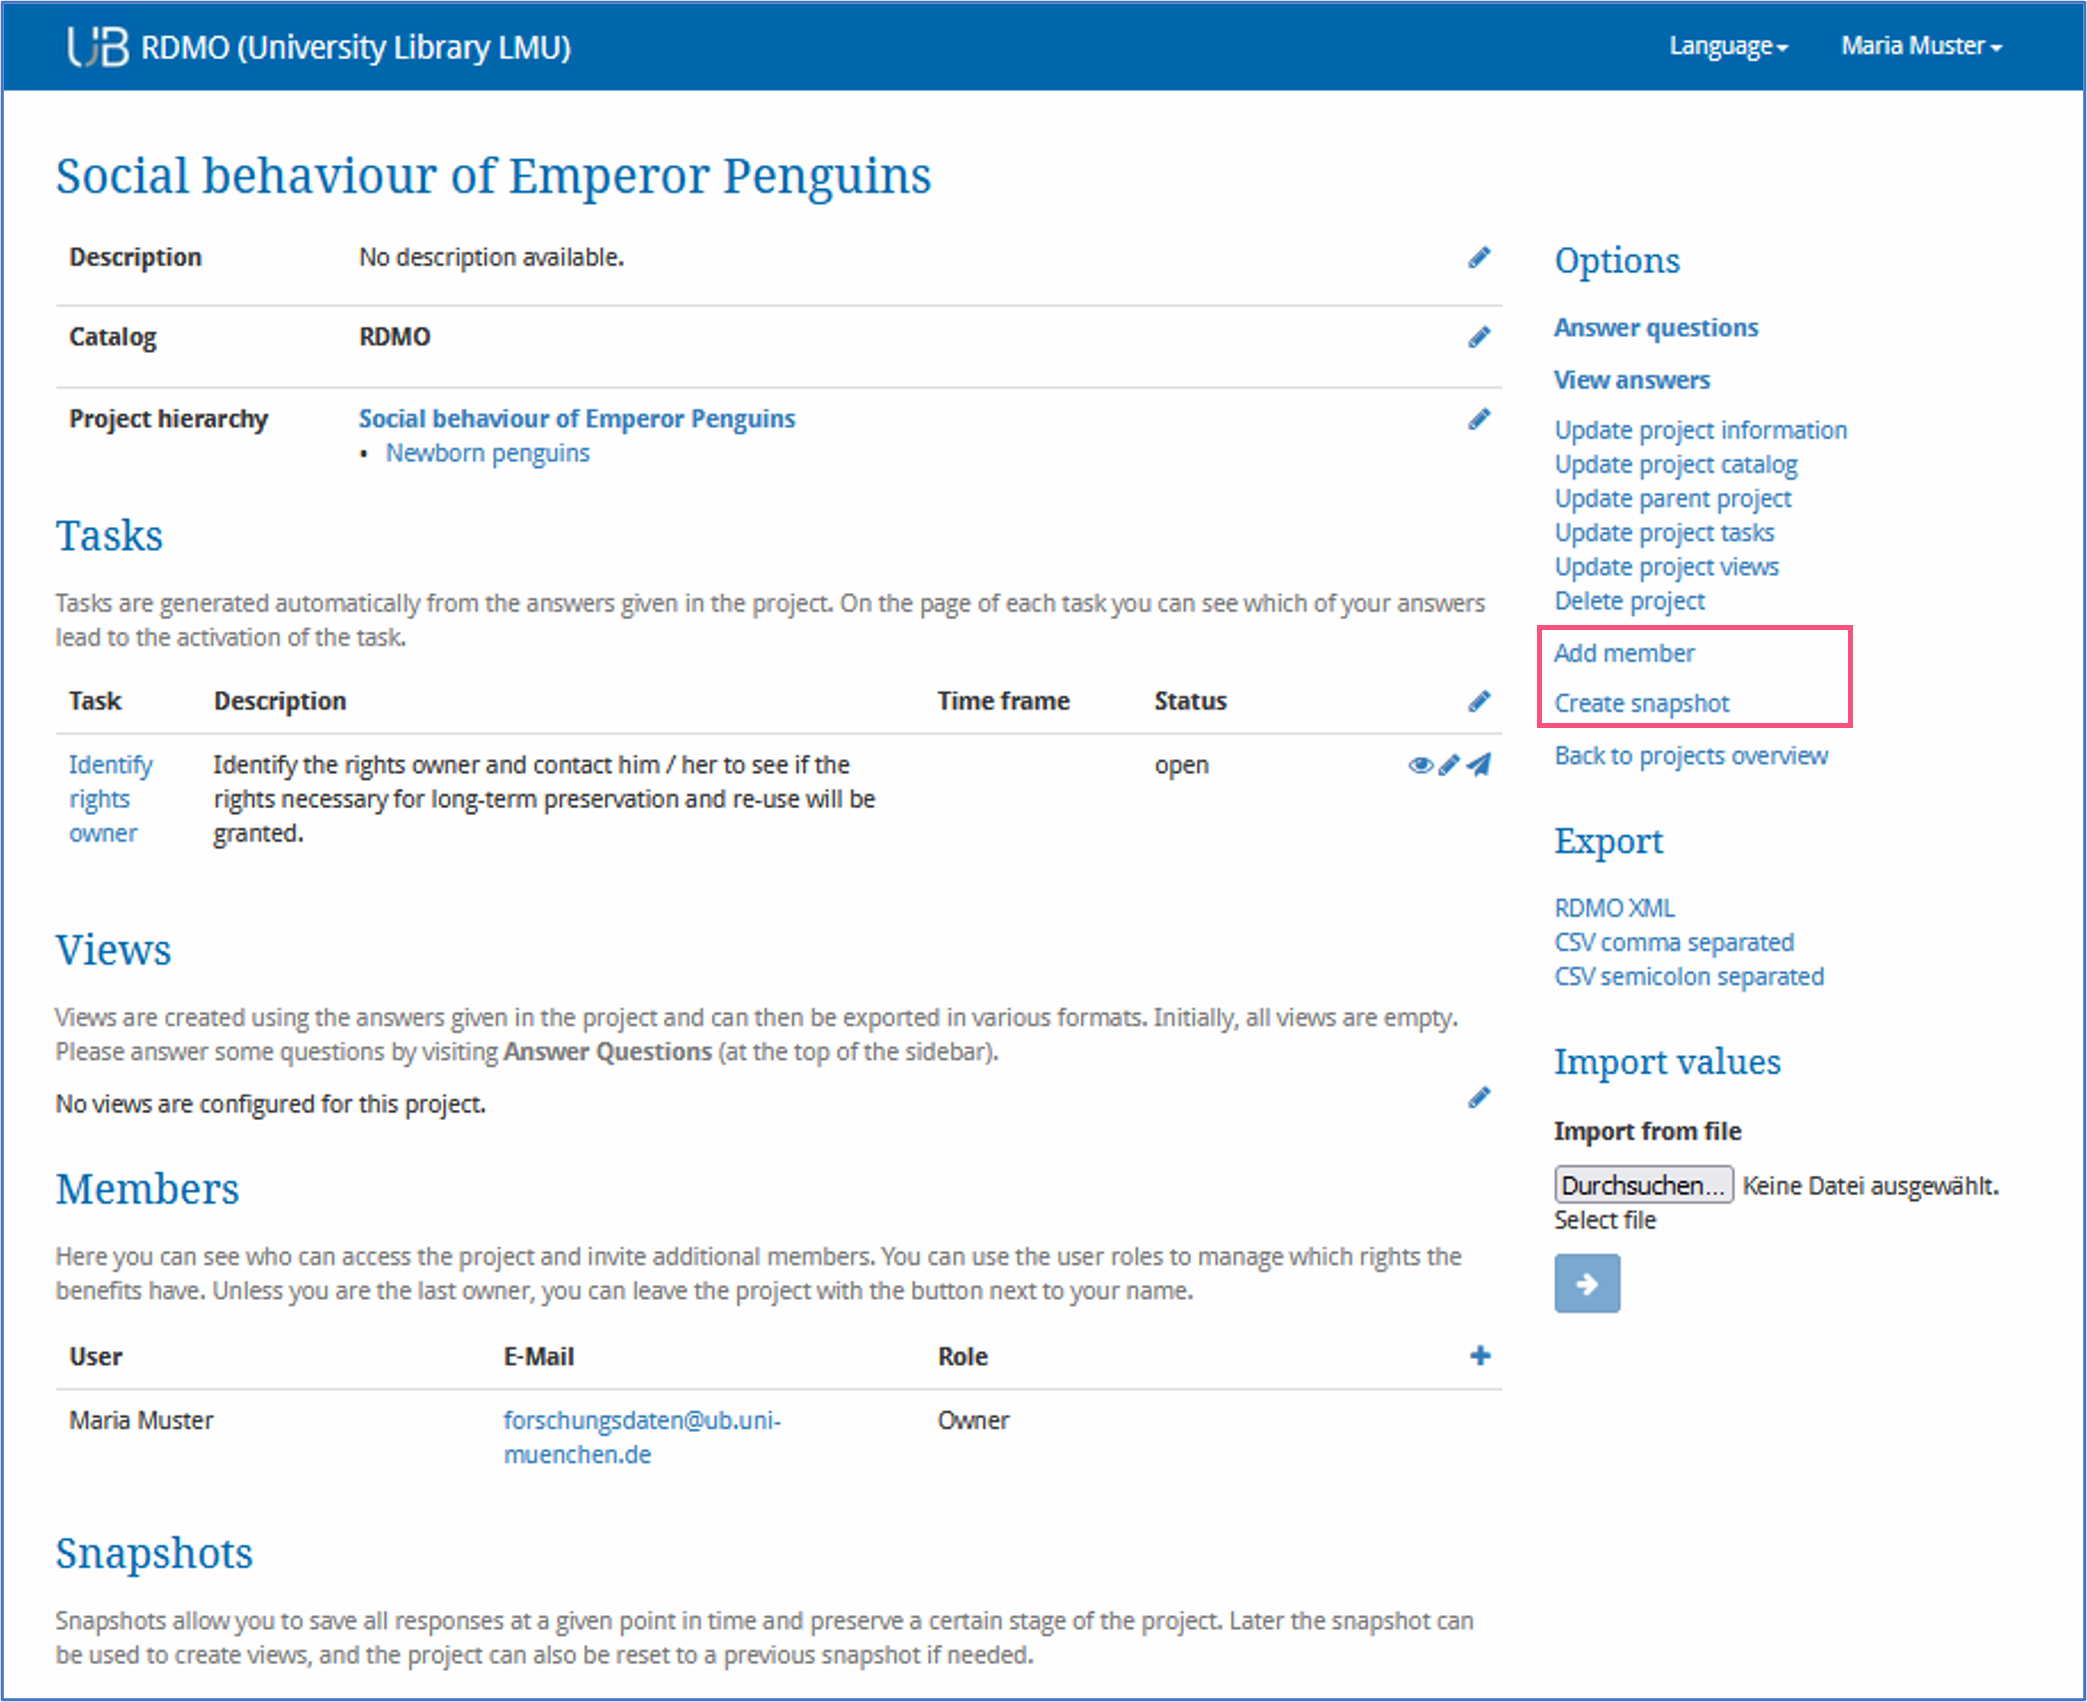
Your newly created data management plan will contain the following information:
- Title, description and selected question catalogue
- Tasks: Tasks will be generated automatically from the responses you have given in the project. On each task page you can see which of your questions have led to the activation of that particular task.
- Views: A view is a template determining how the answers given by the user will be displayed in a text document. For example, certain questions and their answers can be extracted, or the layout adapted.
- Members: This is a list of all persons with access to the project. Every member will be assigned certain project editing rights via a role.
- Snapshots: Snapshots are versions of your data management plan that you can explicitly save. They include saved versions of responses you have made at a given point in time. In this area you will see a list of all your snapshots.
In the area to the right you will see an overview of all available project editing options. For example, this is where you can change the title or description of your project (under "Update project information"). You can also delete your project here. Please note: It is not possible to undo the deletion process.
Clicking on "Answer questions" will automatically lead you to the first questions of the catalogue.
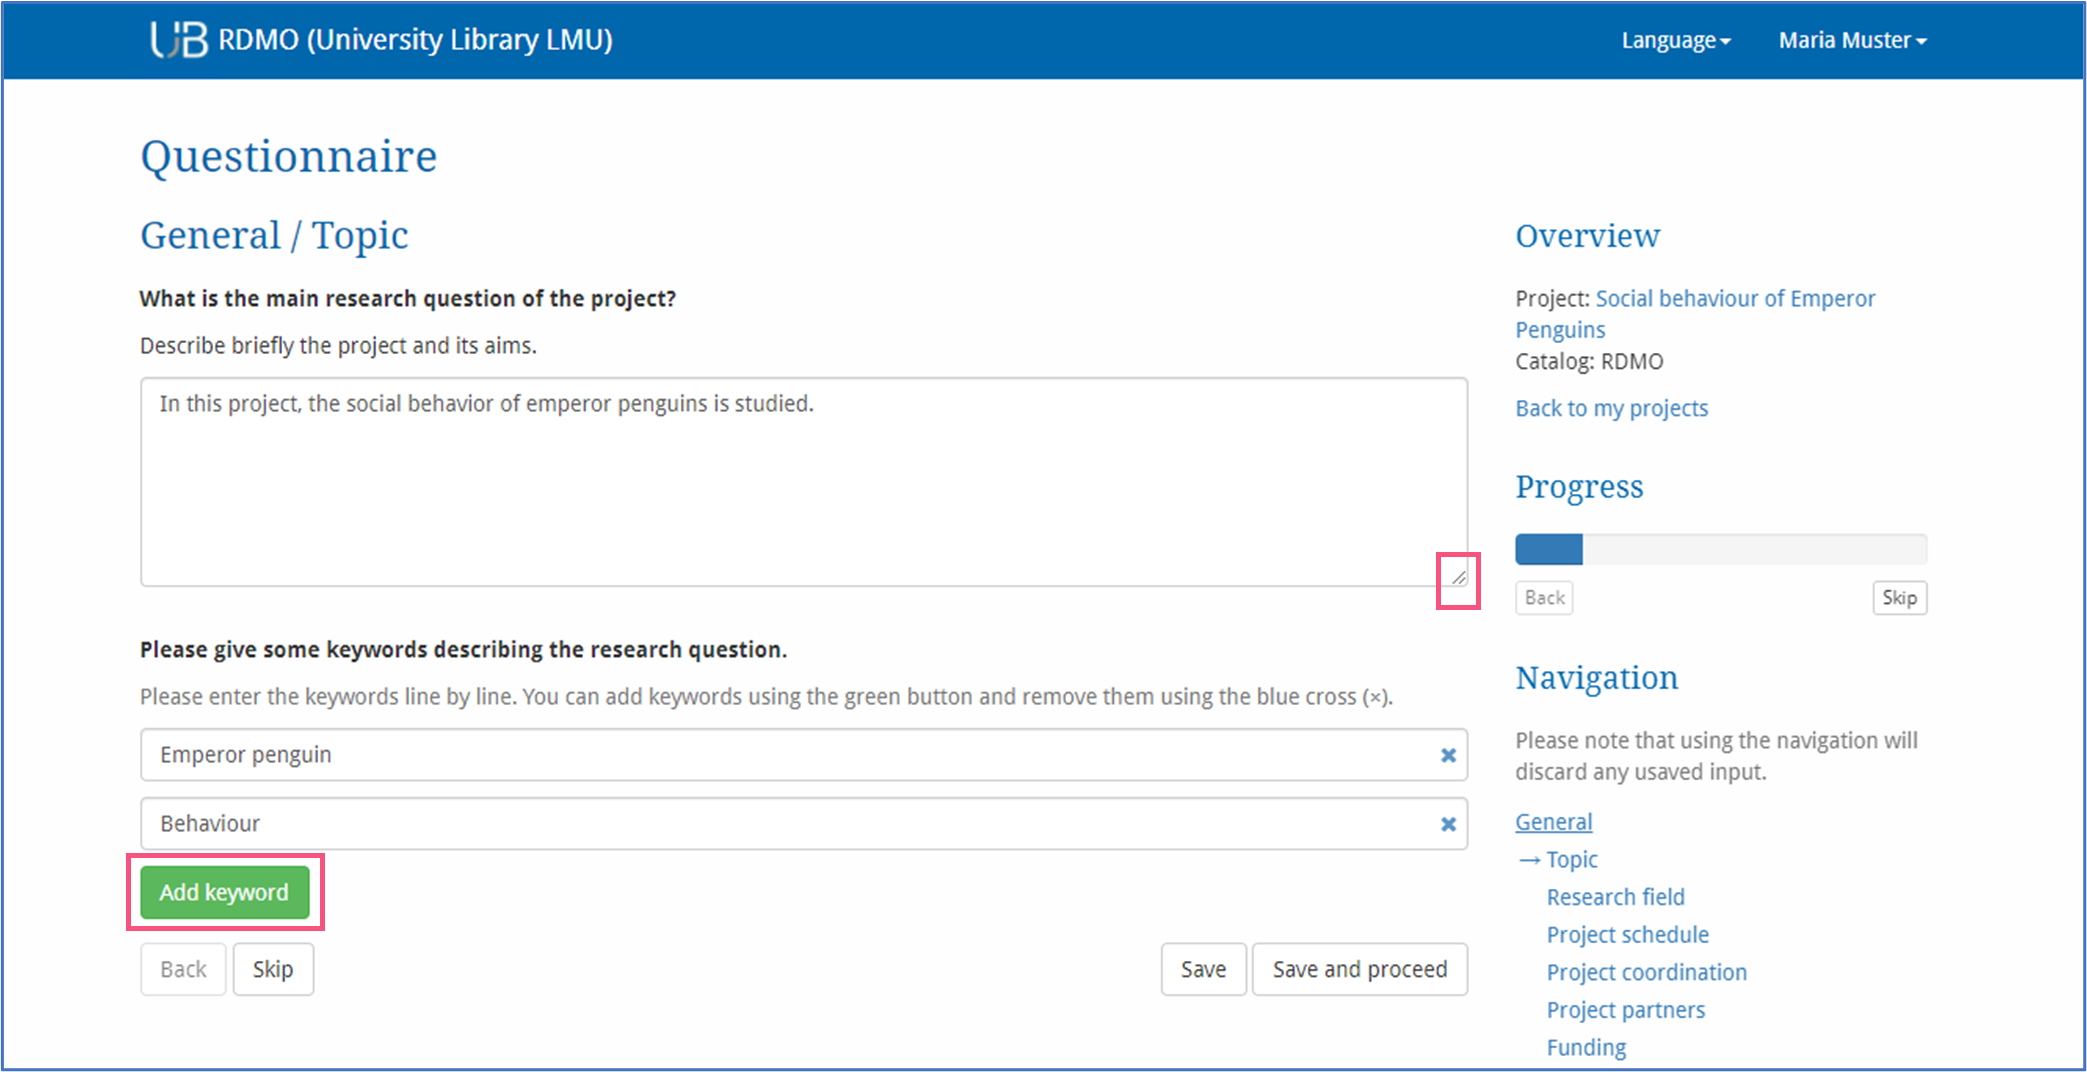
Many questions give you the option of entering your response in a free-text input field. Longer responses will allow you to expand the text field by clicking on the little symbol in the lower right-hand corner and dragging to change the size of the input area.
In the above example you also have the option of entering keywords. Clicking on the green "Add keyword" button will enable you to add more keywords to the response.
At the end of the catalogue you can select from the following options:

- Back: Returns you to the questions on the previous page. (Please note: the input will not be saved.)
- Skip: Takes you on to the next page. (Please note: the input will not be saved.)
- Save: Saves your input without changing the page.
- Save and proceed: Saves your input and directs you to the next page of the question catalogue.
View and export responses
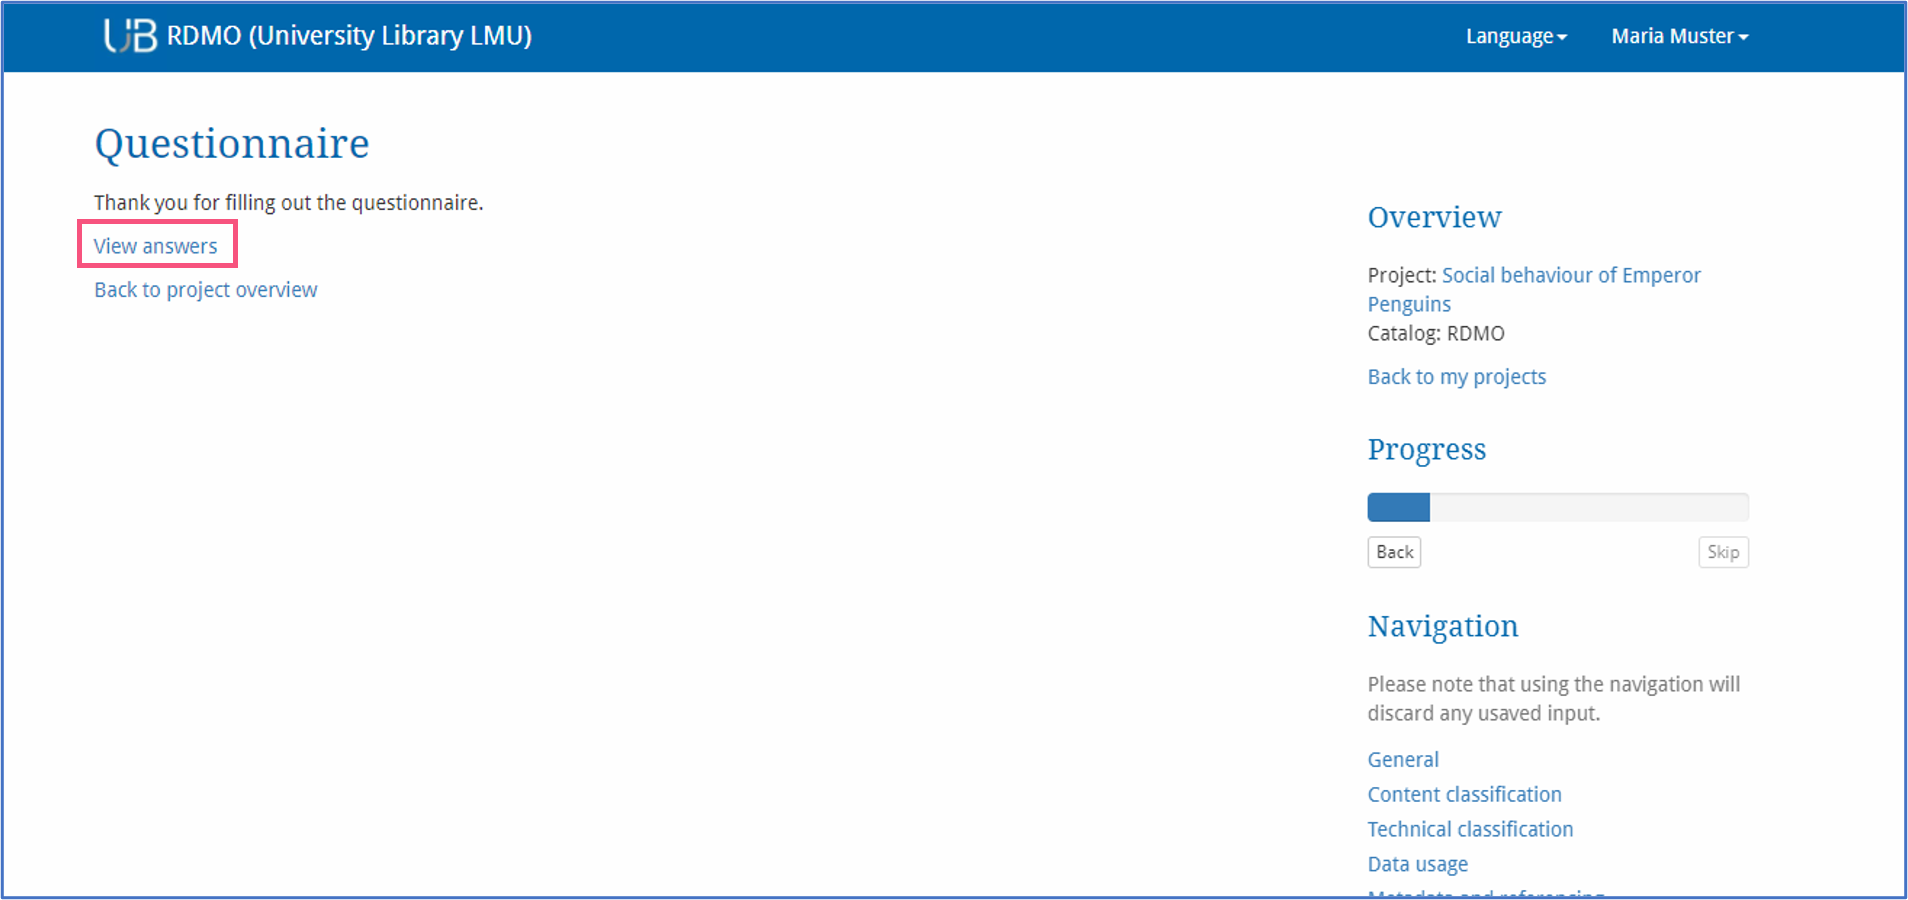
"View answers" will take you to your entries in the project overview. You can then export the questions together with your responses in the following file formats: PDF, Rich Text Format, Open Office, Microsoft Office, HTML, Markdown, mediawiki, LaTex.
The project overview also offers you the option of exporting your project in XML format or as a CSV table.
How to add members
You can add new members in order to share your data management plan with others. To do this, click on "Add member" in the right-hand menu bar of the project overview and enter the user name or the e-mail address of the person to be added. You must then select the role this member is to receive. The member's editing powers depend on the assigned role. As "Owner" this person will, like you, have access to all editing rights to the project (including deletion). The status "Guest" has read-only rights. You will find a list of all members in the project overview, where you can also choose to remove members.
Create a snapshot
Once you have saved your answers you cannot revert to an earlier version of your data management plan. For this reason, it is a good idea to create snapshots. Snapshots record the status of your work at the current moment, so that you can refer to it later if required.
Click on "Create snapshot" in the right-hand menu bar of your project overview and give the snapshot a title and a description (optional). The snapshots will be listed in your project overview.
Contact and further information
If you have any questions on research management and RDMO, please contact forschungsdaten@ub.uni-muenchen.de.
As part of the model project "eHumanities – interdisziplinär" the University Library at Erlangen-Nuremberg University has developed special learning modules for RDMO. These learning modules can be used across a wide range of disciplines. We will be happy to advise you, should you wish to re-use the materials or integrate them into your own teaching.
Learning modules for RDMO (in German)
This manual was updated on 9 April 2021 (version 1.9) and is based on the Quickstart Guide provided by RDMO.
RDMO Quickstart Guide (in German, 258 KB)


